Managing my Team Payments
As a team or payment owner, you have the capability to manage your team and their spending limit through the Payment Sharing Settings page. Here’s a guide for you to manage your team for Team Payments.
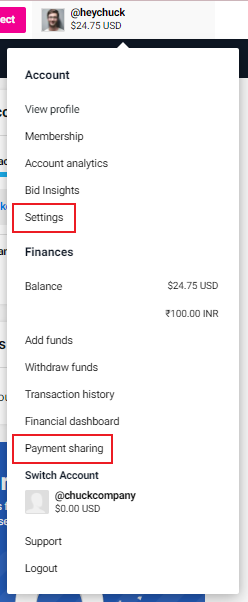
1. Go to the Payment and Financials page. There are two ways to go to this page. From the dropdown menu in your profile picture in the main navigation bar you can click 1) Payment sharing OR 2) Settings > Payment and Financials.
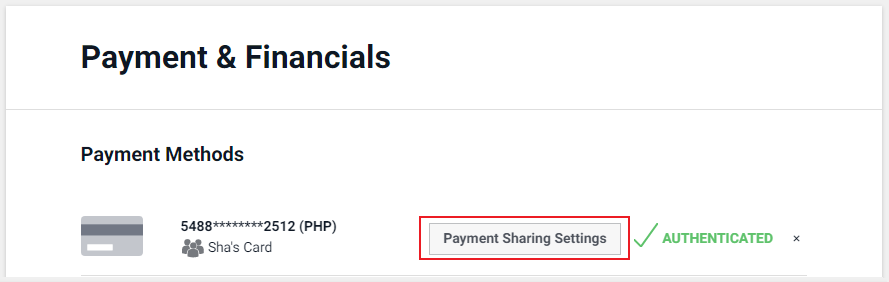
2. Beside the card where your Team Payment is, click Payment Sharing Settings.
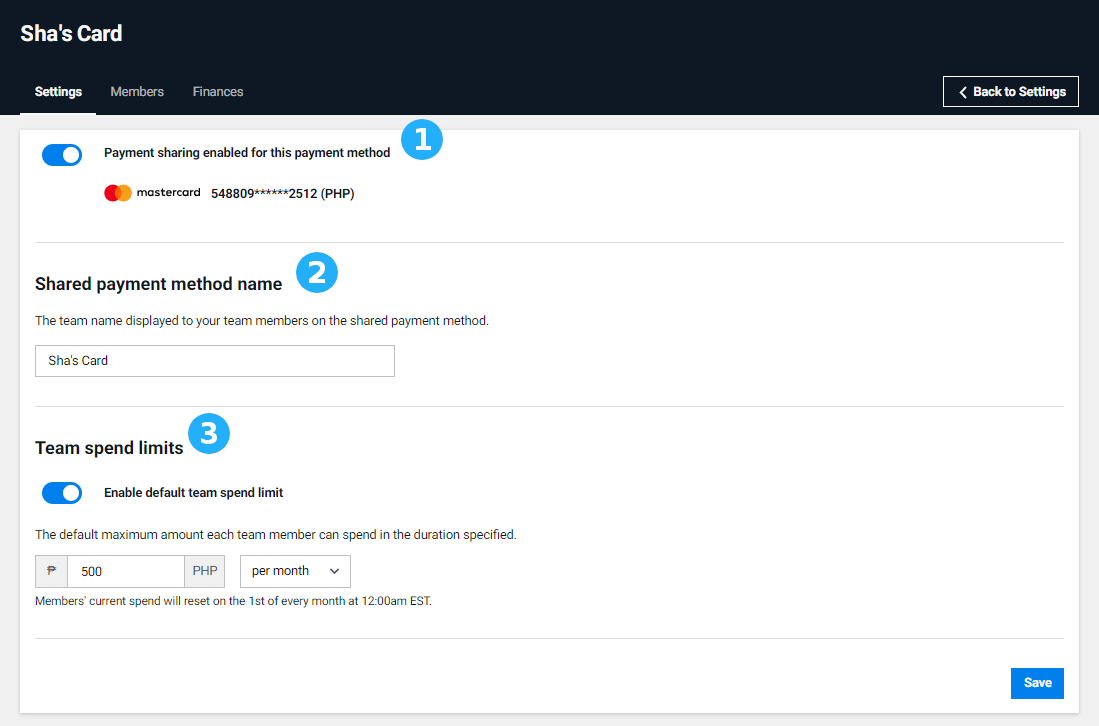
Inside your Team Payment, you will see three tabs: Settings, Members, and Finances.

Settings
From here, you can:
(1) enable or disable Payment Sharing,
(2) change the name of your Team Payment,
(3) enable or disable a default spend limit for everyone in your team. If enabled, you can update your preferred default spend limit.
Always save your changes before leaving this page.
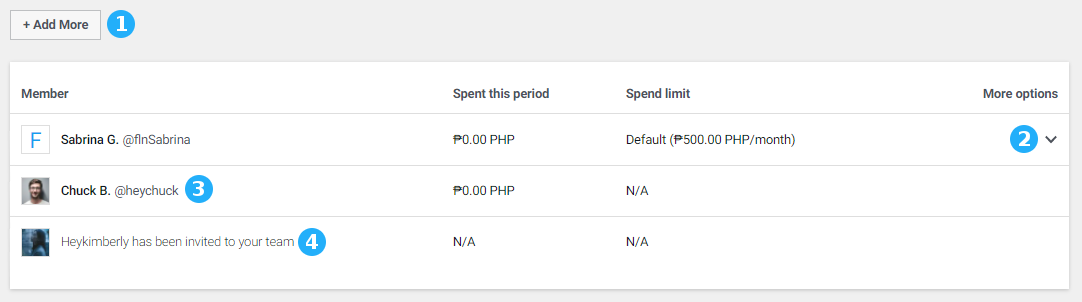
Members
This is where you can add or remove members and manage their individual spending limits.
(1) The +Add More button lets you invite new members using their username or email address. Users you invited will be notified via email.
(2) For members who accepted your invitation, you will be able to update their spend limit or remove them from the team through the drop down menu under More options.
(3) You as the payment owner will also be listed as a member (in no particular order). Team owner’s spend limit will show as N/A as you own the payment method.
(4) Invitations pending for acceptance are also visible on your list.
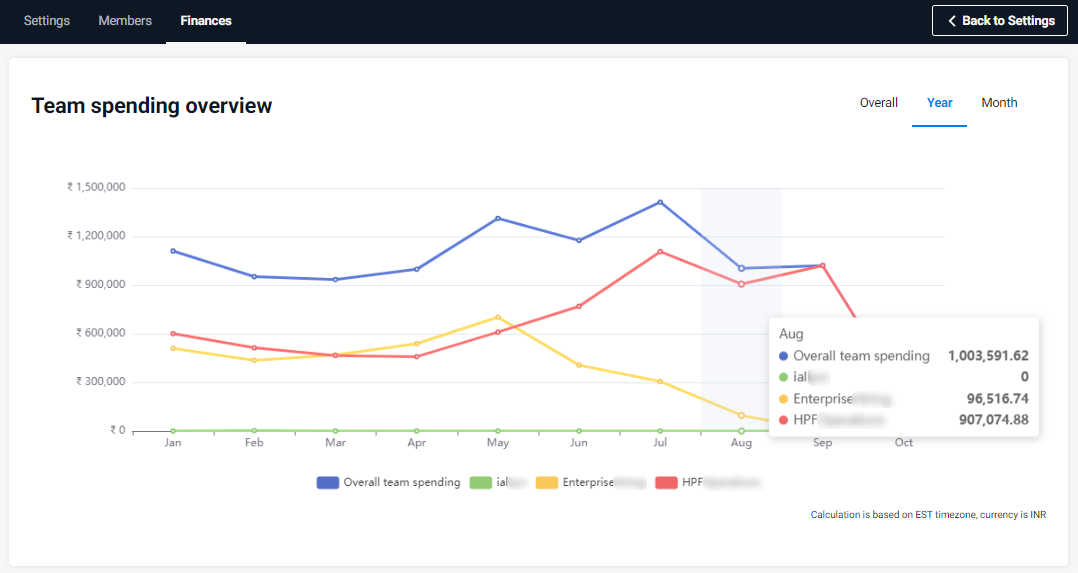
Finances
Here, you can have a quick view of the spending of your team in a line graph. You can toggle between overall, yearly, and monthly spending graphs. Hovering over the graphs lets you see the overall amount spent by your team and their individual total spent for that month, day or year.